One of the reasons for adopting the Flyway command-line was the easy setup process (no need to install). First, I will show how to set up Flyway for a single database, i.e., as if have only one database in your server, and than the setup for multiple databases in a server.
Single database
You can download Flyway command-line here.
After downloading and extracting you have the following folders/files structure:
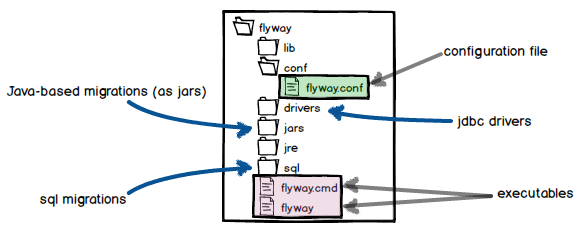
In this case, it’s only necessary to work the “flyway.conf” file (you can find it in the conf folder):
- Set url to target server/database
- Set user and password to target server/database

Alternatively you don´t need to set user and password on the configuration file, it can be provided as argument.
flyway.cmd -user=eduardo.piairo -password=eduardo.piairo info
Multiple databases
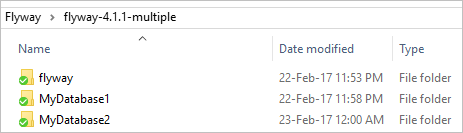
Because numbers matter! If you have two or more databases in your server, a option is to apply the single database setup for every database. This approach will lead to an unnecessary files multiplication. As alternative we can create a centralized folder dedicated to the Flyway application.
- Extract Flyway for a folder and change the name of the folder for flyway;
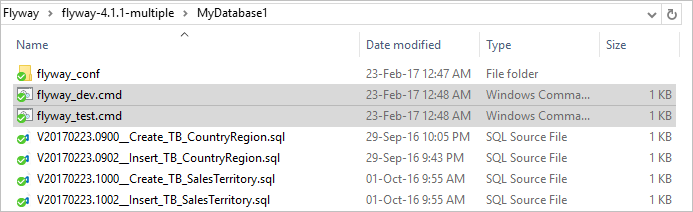
- Create a folder each one of your databases (MyDatabase1, MyDatabase2, …);
- Create the folder flyway_conf and copy the file flyway.conf inside;
- For flyway.conf file set url, user and password for the target database;
- Uncomment the locations configuration and set his value with “filesystem:.” (flyway.locations=filesystem:.). This means that Flyway will scan recursively for migrations the folder that contains the flyway.cmd (MyDatabase1 for example);
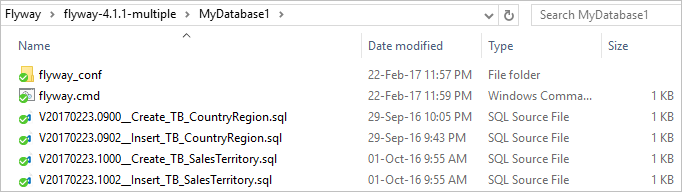

- Create the file flyway.cmd with the following code inside:
..\flyway\flyway.cmd -configFile=./flyway_conf/flyway.conf %*

- After this you can execute the flyway command from each database.
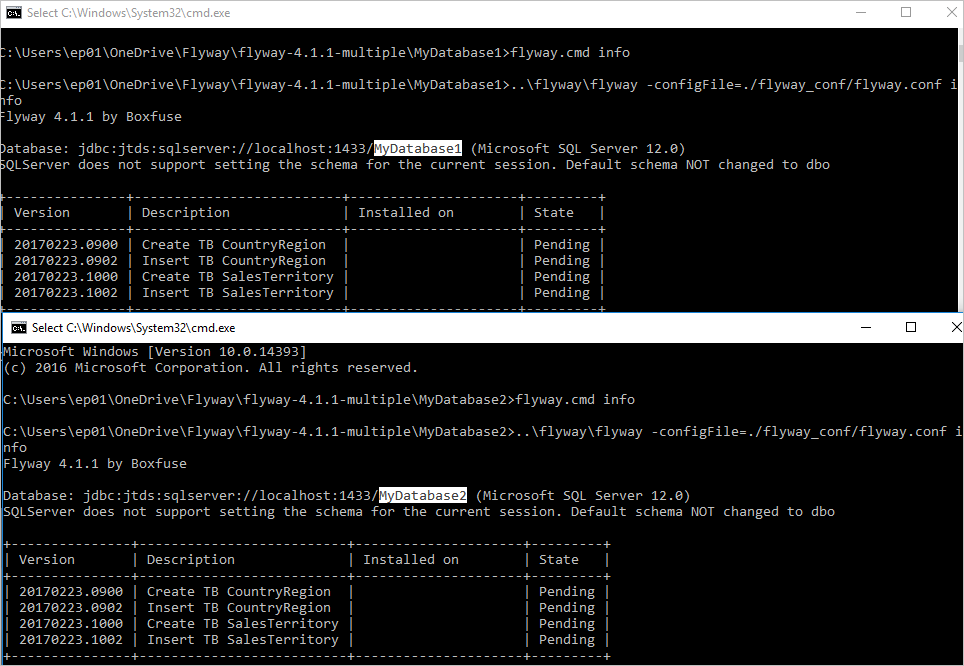
And that’s it! You are ready for manage the changes of multiple databases.
Multiple servers
If you have multiple servers like: dev, test, staging, … the solution is to create a flyway.cmd and flyway.conf for each server/environment.
- Inside flyway/flyway_conf folder create a flyway_servername.conf file for each server (flyway_dev.conf, flyway_test.conf) and set the url, user and password for the target server and database;
- Create a flyway_servername.cmd file for each server (flyway_dev.cmd, flyway_test.cmd). Muke sure that you are using the correct configuration file;
- Inside of each cmd file should be the following code:
..\flyway\flyway.cmd -configFile=./flyway_conf/flyway_servername.conf %*

You just have to execute the flyway command for the intended server/environment.
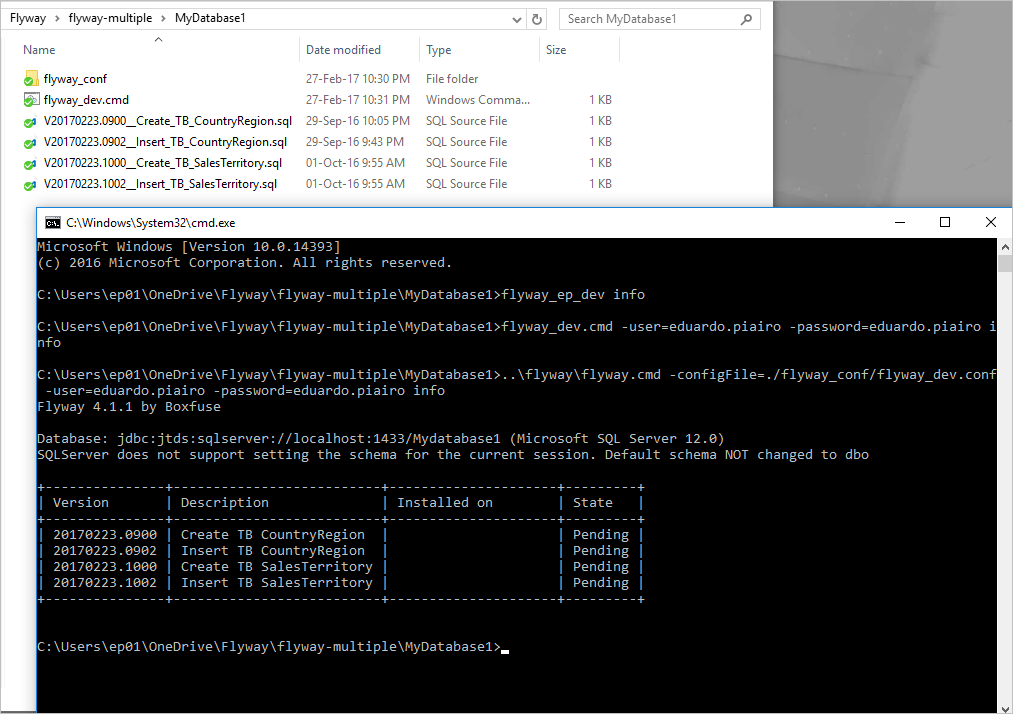
User and Password
Because we want to source control all migrations and Flyway related files, saving the user name and the password in plain text in the configuration file it’s not such a good idea. So, where’s a solution:
- Remove your user name and password from your configuration file;
- Create the folder “C:\Program Files (x86)\flyway” and inside this folder create the file flyway_ep_dev.cmd
- The file flyway_ep_dev.cmd should contain the following code:
flyway_dev.cmd -user=eduardo.piairo -password=eduardo.piairo %*
- Add the folder “C:\Program Files (x86)\flyway” to you PATH.
This way you just have removed your credentials from you source control. You should run the new cmd file from your target database.
1 comments On Flyway command-line easy setup
Great stuff. There’s surprisingly very few tutorials about Flyway out there, this helped me out a lot for my internship (studying tools and options to apply CI/CD to DBs). Thanks a million, Eduardo